


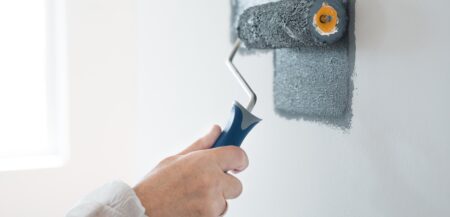
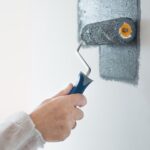
Before you crack open a can of paint and grab a brush, there’s one golden rule in home painting: Preparation is everything.
Whether you’re refreshing a bedroom wall or giving your entire exterior a facelift, a properly prepared surface is the key to achieving smooth, professional-looking results that last.
Let’s break down the four essential prep steps that should never be skipped:
1. 🧼 Clean the Surface First
Paint won’t stick to a dirty surface. Over time, walls — especially exteriors — collect dust, dirt, grease, mildew, and even pollen.
-
For interiors: Wipe down walls with a damp cloth or mild soap solution. Pay special attention to kitchens and bathrooms where grime builds up.
-
For exteriors: Pressure washing is highly recommended. It removes stubborn buildup and preps the surface for better paint adhesion.
✅ Pro Tip: Let surfaces dry completely before moving on to the next step.
2. 🛠️ Repair Imperfections
Painting over holes, cracks, or rough spots may make them more noticeable.
-
Fill nail holes and cracks with spackle or filler.
-
Use a sanding block to smooth patched areas and rough textures.
-
For damaged drywall or siding, consider professional repairs before painting.
💡 A smooth surface results in a cleaner, more even paint finish.
3. 🎯 Use Painter’s Tape Correctly
Painter’s tape is your best friend when it comes to clean, crisp lines — but only if used properly.
-
Apply it firmly along edges (baseboards, trims, ceilings).
-
Smooth it down completely to prevent paint bleed.
-
Remove it while the paint is still slightly wet to avoid peeling dried paint with the tape.
⚠️ Avoid leaving tape on for too long, especially in humid climates like Florida.
4. 🧻 Protect Floors and Fixtures
Paint can get messy. Avoid costly cleanup and damage by covering anything you don’t want splattered.
-
Use canvas drop cloths or plastic sheeting for floors and furniture.
-
Cover light switches, outlets, and door handles with painter’s tape or remove them entirely.
-
Tape off windows, cabinets, and fixtures.
🧽 A few minutes of protection can save hours of scrubbing later.
Final Thoughts
Skipping prep work might save time up front, but it can lead to peeling paint, uneven results, and the need for costly touch-ups down the road. Invest the time in these four foundational steps, and your paint job will not only look better — it’ll last longer too.


No Comment